Suggested Learning Intentions
- To estimate, measure, and compare different lengths, masses, capacities, and temperatures of common items
- To accurately measure using scaled instruments
Sample Success Criteria
- I can estimate the size of a range of dimensions
- I can measure using a range of units
- I can compare different dimensions of two or more common shapes or objects
- I can explain my thinking using a range of manipulatives
- Eight different items which can be measured (weight, length, height, circumference, temperature, volume). Include everyday items that students are likely be familiar with (e.g. a pencil, a box of cereal, a kilo bag of flour with a label hidden, a bottle of drink, a shoe, an A4 sheet of paper, a brick). For each item, provide a variety of tools that can be used to measure those dimensions.
- A class set of rulers
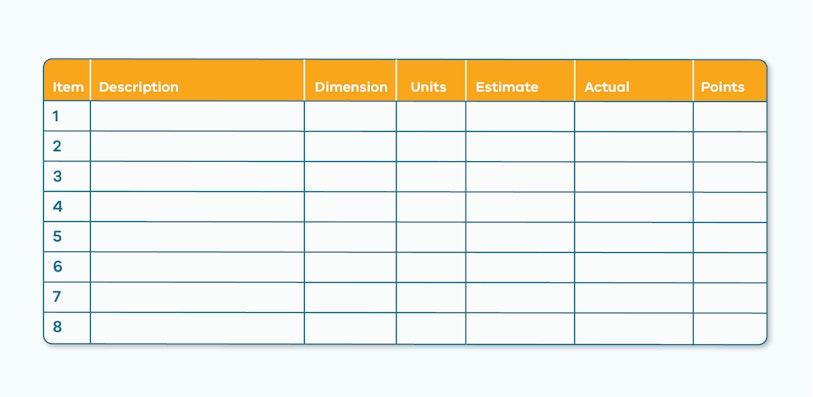
- Estimation Table (optional): docx PDF
To begin this activity, write the following words on the board. Encourage students to work in pairs to find the comparative pair or opposite of each word. For example:
- Smaller
- Heavier
- Wider
- Holds more
- Hotter
- Farthest
- Less
Next, have students compare two items and assign a comparative attribute to each item. Bring a variety of items (different sized jugs, different weighted bags of flour, warm and cold water, a jar which is filled with more marbles and a jar which is filled with fewer marbles etc) to class and have students compare them. If you do not have a ready supply of different items, prepare some pictures which allow for comparison.

Enable students by teaching vocabulary prior to beginning the learning sequence. Use cue cards with illustrations to help students understand the meaning of vocabulary. Encourage students to use words which they are most familiar with. Have them feel the objects and heft them to see which is heavier. Have students place the objects side by side to compare widths.
How big is 10cm?
Ask students to draw a 10cm line in their workbook or on a plain piece of paper. Explain that they cannot use a ruler to measure and draw the line; they must use their estimation skills.
Next, ask students to accurately measure and draw a 10cm line parallel to their estimate using a ruler. As students to compare their estimate to the actual length. How close did they get?
Support students to determine the difference between their estimate and the actual length by measuring the difference between the actual and estimate and compare this difference with the other students sitting at their table.

Encourage students to discuss who had the larger difference? Who had the smaller difference? How do you know this?
Enable students to participate in the estimation of a dimension by supporting them to use comparative language such as larger, smaller, same length as. Students could be given a list of these words.
Extend students by asking them to decide which of the following two students is correct:
Thao says that she is really good at estimating and, so when she measures a length, she only needs to estimate it. However, Sam says you should always use a ruler to measure length. Who is correct?
This activity is titled 'Beat the V' as it was created by Rob Vingerhoets.
Bring around eight items that can all be measured to class. Introduce one item at a time and inform students which dimension of the object they will estimate and eventually measure. Collectively as a class, they decide on the units which will be used. For example, ask students: 'If we are measuring the table what units would we use? Would we use millimetres? Centimetres? Or metres?'
Students then estimate the size of the dimension (using the appropriate units) and record their estimates in a table (see the Materials and texts section above, or have students create their own).
As a class, decide on the how the points will be awarded. Here is an example of how you might distribute the points for the measuring of a pencil. A student might receive 5 points for a correct estimate, 2 points if the estimate is within 3cm of the actual measurement and 1 point if their estimate is reasonable (they have used cm and remained below 30 cm).
Once each item has been measured accurately, score based on how close each estimate is to the actual value.
Tips
- Initially, invite students to suggest the dimension which is being investigated and the units used. Use this as an opportunity to engage interest.
- Guide students to use their knowledge of familiar units as a benchmark for their estimations. For example, prior to this activity you might have students measure out certain lengths, weights, areas, volumes, and capacity so they can make indirect comparisons. Encourage students to think which item is bigger, heavier, takes up more space or can hold more. It is always helpful to have benchmark items in your classroom. For example, using rolled up sheets of newspaper students can make a frame which illustrates 1m3.
- Model how to convert between units and support students to convert between formal units of measure and express their estimates in more than one unit of measure.
- Use your professional judgement when assigning scores. You might decide to assign 5-points for an exact answer and 2-points for an estimate within a reasonable range either side of the exact answer. These points will fluctuate depending on the items chosen and how much experience your students have with both the size of the item and the units of measure. For example, estimating the length of an item is ‘easier’ than estimating the area or volume of an item.
- When selecting items, include objects with units that most students are familiar with and only introduce one or two more complex items. If most of the items are too difficult for the students, you will have high levels of disengagement.
This activity can be used over and over in your classroom – each time with a different range of items or foci. The more times students engage with estimation the more likely they are to develop an intuitive sense of size and proportion.
When directing students to measure the items accurately, offer a range of measuring tools. The tools that you offer will depend on the level of experience and competence of students in your classroom. Along with offering the correct tools we would suggest offering tools which are less useful, for example a trundle wheel. The offering of a less useful tool provides an opportunity to discuss how to select the correct measuring tool (i.e., the size to be measured, the attribute to be measured and the degree of accuracy needed). For example, using bathroom scales to weigh ingredients to bake a cake is not useful as it is not accurate enough.
Extend students by asking them to name five things that have volume but not capacity. Volume and capacity are properties of three-dimensional objects. Volume is the space that an object occupies, and capacity describes the maximum amount that a container can hold.
Areas for further exploration
Lead a discussion with your class to explore when and how to select the most appropriate measuring tool. For example:
- When do you need a high level of accuracy?
- When is close enough, good enough?

Facilitate a class discussion around the use of non-conventional measurement tools. Ask students if they think it is acceptable to use them. Are there times when using non-conventional units is useful? For example, when measuring the width of a wall to determine if a couch could fit up against it, is it acceptable to just pace it out? What about when installing cupboards into a new kitchen, would it be acceptable to pace it out or use handspans? Or might it be essential to measure accurately down to the millimetre to ensure the cupboards fit?
The purpose of this stage is for students to develop an ability to estimate with accuracy and to compare their estimates to the actual value using various measurement tools. Teachers are encouraged to select items to be measured which build on their students’ current knowledge and understanding. You are only limited by your imagination.
'Beat the V' is a good activity to gauge your students understanding. You could use the activity as your pre or post assessment task.
At the conclusion of this stage, set a range of problem-solving tasks for students to answer. Or you might ask students to reflect on which items were the easiest to estimate and which were the most difficult when undertaking Beat the V.
Support students to see that the more familiar they are with the item or the dimension the more likely they are to estimate with greater accuracy. For example, students are more likely to estimate a length with greater accuracy then they are to estimate a circumference.

Ask the class if anyone used non-conventional units to support their estimates. Perhaps they used their handspan or a pen as a reference point? Did they know that their finger width is approximately 1cm wide and did they use this knowledge to help them estimate the length of something else?
Vingerhoets, R., n.d. Maths Doesn't Have to Hurt. [Online]
Available at: http://robvingerhoets.com.au/maths/
[Accessed 15 March 2022].
Other stages
2. Uncle Jack's Land
EXPLORESuggested Learning Intentions
- To compare and contrast perimeter and area
- To explain how to convert between units of linear measurement
- To formulate the rules for areas of two-dimensional shapes
- Students explore and define equable shapes
Sample Success Criteria
- I can explain the difference between perimeter and area
- I can convert between different units of measurement
- I can calculate the area of two-dimensional shapes
- I can define equable shapes
- I can use manipulatives to model and explain my thinking
3. Do We Have Enough Space?
EXPLORESuggested Learning Intentions
- To devise the formulas for area of two-dimensional shapes and to make connections to real-life problem applications of these rules
- To solve problems involving the comparisons of lengths and area using appropriate units
Sample Success Criteria
- I can calculate perimeter and area
- I can solve real-world problems using my knowledge of two-dimensional shapes
- I can model my solutions using a range of manipulatives
4. Who is Right?
EXPLORESuggested Learning Intentions
- To articulate the formulae for areas of two-dimensional shapes
- To explain how to convert between units of linear measurement
Sample Success Criteria
- I can convert between different units of measurement
- I can describe the formulae to calculate areas of two-dimensional shapes
- I can calculate the area of two-dimensional shapes
- I can use concrete materials to model my thinking and justify my solutions
5. How Big is That Balloon?
EXPLORESuggested Learning Intentions
- To compare different lengths, masses, capacities, and temperatures
- To convert between a range of units
- To theorise the volume of a sphere
Sample Success Criteria
- I can compare different measurements
- I can convert between different units of measure
- I can calculate the volume of a sphere
- I can use manipulatives to model and demonstrate my thinking